Getting Started
You can be up and running in about five minutes. This guide walks through every step: creating an account, setting up your team, adding your squad, and scheduling your first game.
1. Create your account
- Go to the login page.
- Enter your email address and tap Continue.
- Open the sign-in link we email you. New email? You'll land on your dashboard straight away. No password to remember.
Already have an account? Go to /login instead.
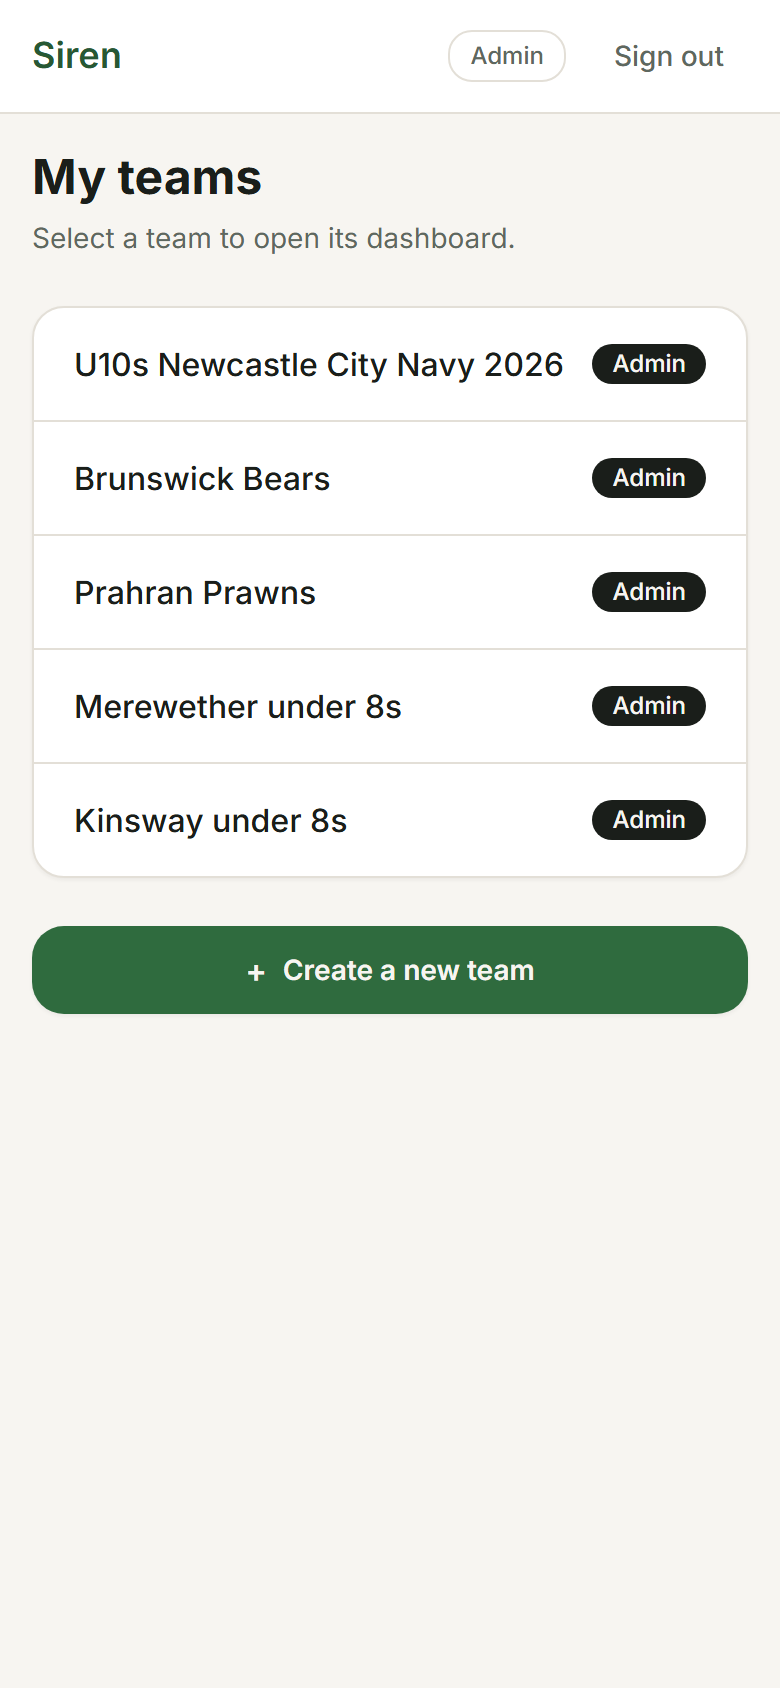
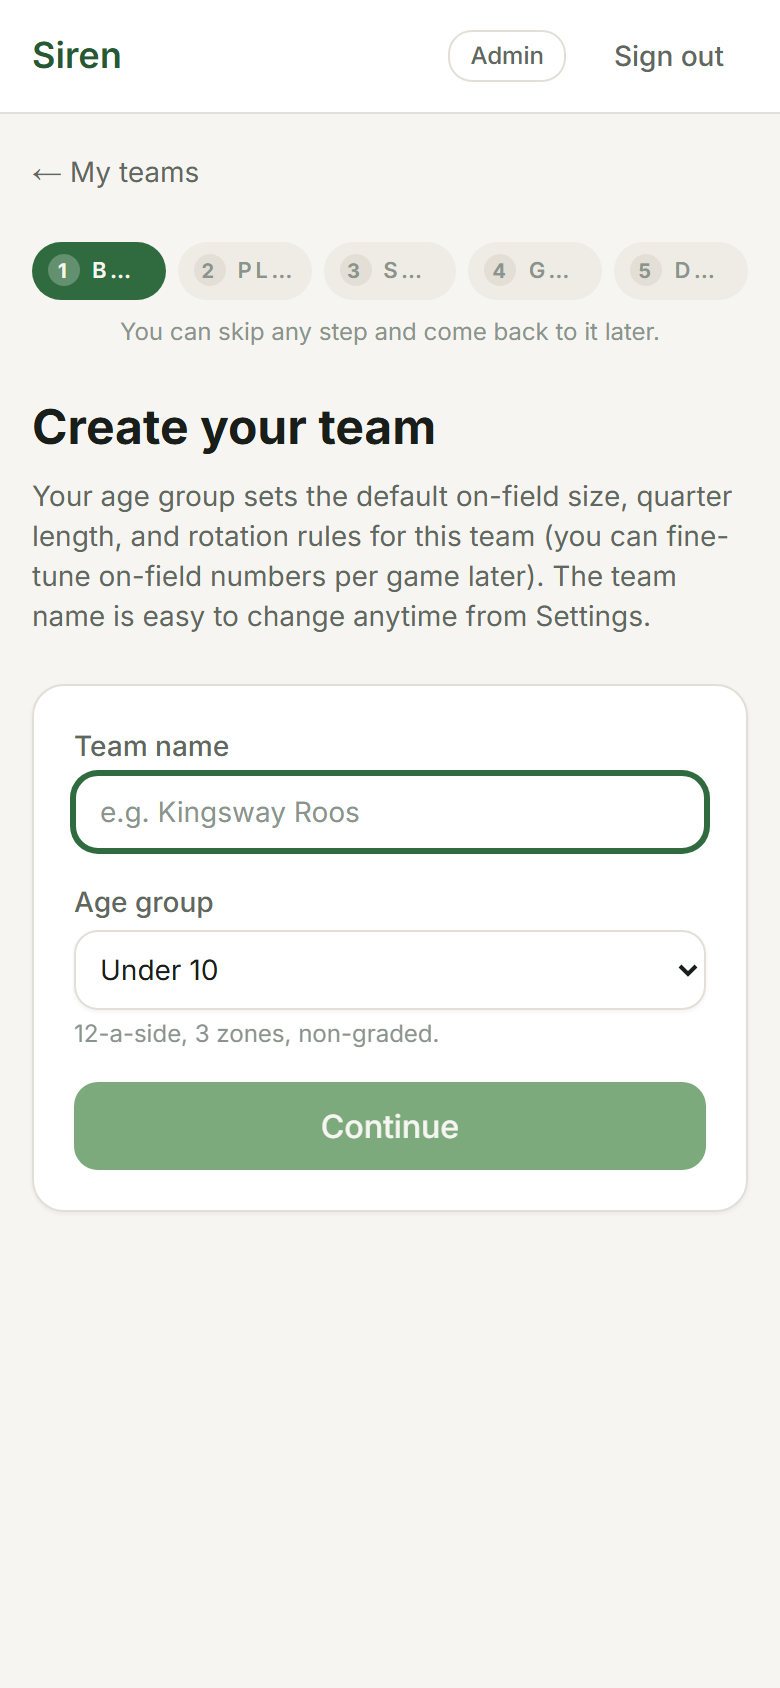
2. Create your first team
- On the dashboard, tap New team.
- Give your team a name (e.g. Brunswick U10s), pick a sport, and select the age group. The age group controls how many positions appear during a live game and how rotation suggestions are generated.
- Tap Create team. Your new team card appears on the dashboard.
💡
You can rename the team or change its settings any time from the team's Settings tab. See Teams for details.
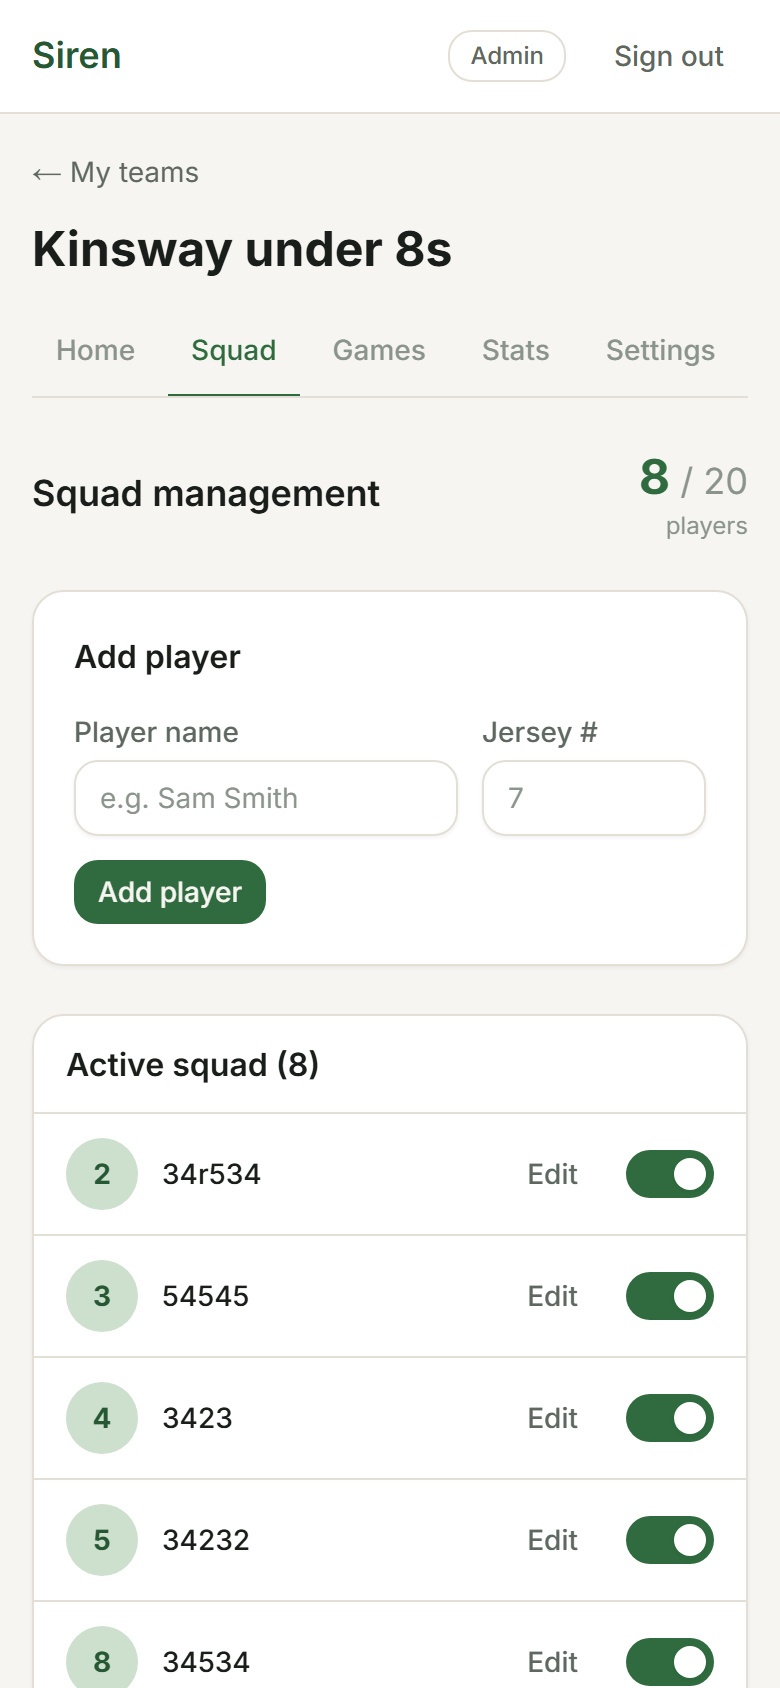
3. Add your squad
- Open your team and tap the Squad tab.
- Tap Add player. Enter the player's full name and (optionally) a jersey number, then tap Save. Football teams typically assign numbers; netball teams usually leave them blank.
- Repeat for every player in your squad.
You can add more players at any time, including on game day. See Squads for editing, removing, and managing availability.
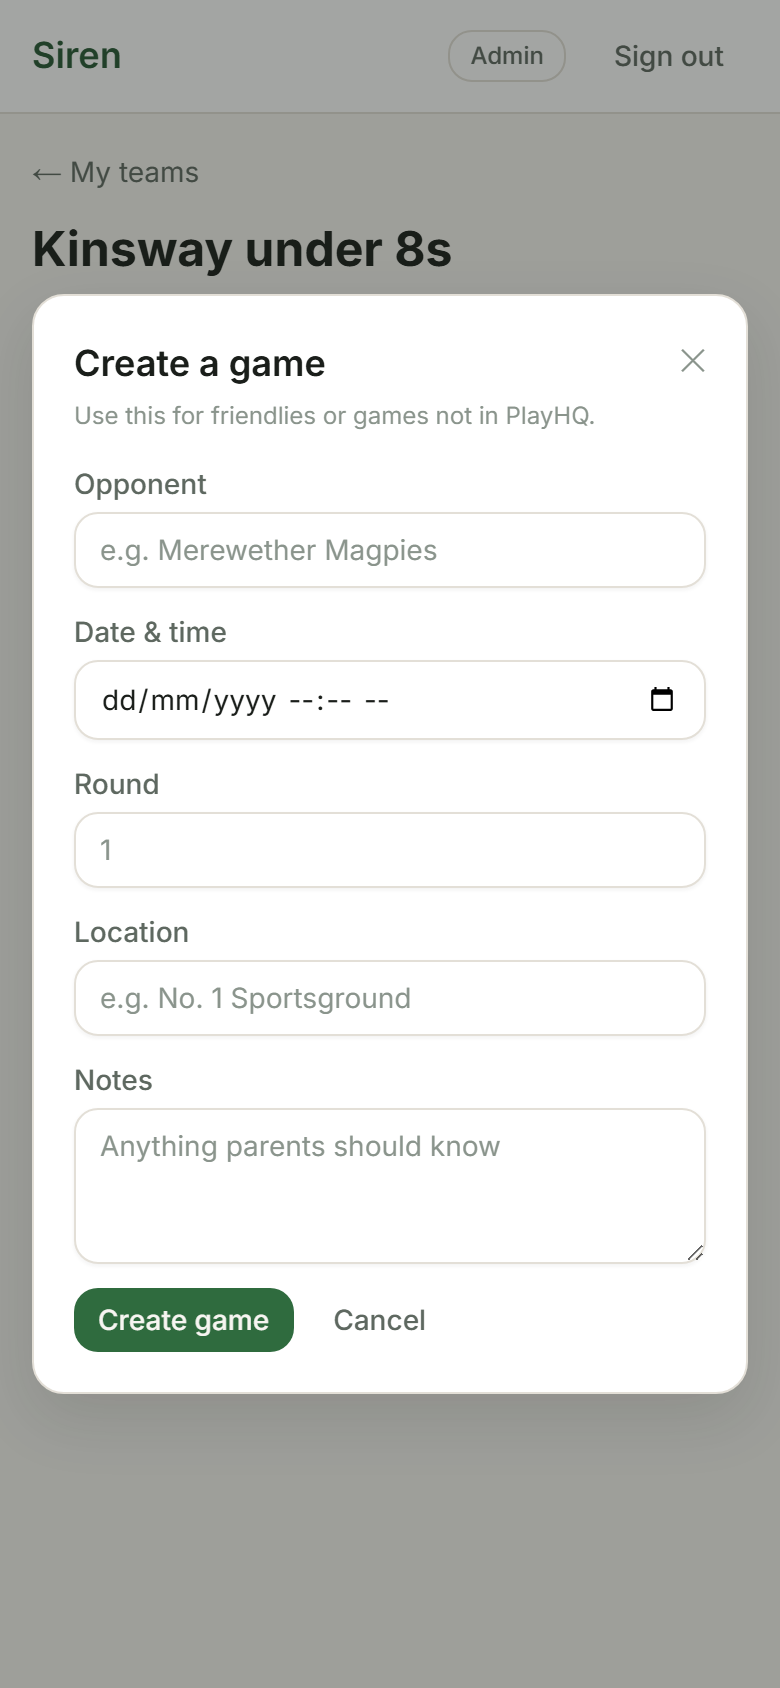
4. Schedule a game
- Open your team and tap the Games tab.
- Tap New game. Fill in the opponent name, round number, date, time, and optional venue.
- Tap Save. The game appears in your games list with Upcoming status.
💡
On game day, open the game card and tap Start game to enter the live game view. See Live Game for a full walkthrough.
What's next?
- Live Game → Running a game on the day: lineups, scoring, subs, quarter breaks.
- Rotations → How the algorithm suggests fair swaps.
- Stats → Everything you can see in the Stats tab after games are played.